Monday 28 February 2011

stampin' around

Ok, so I still don't think I'm having a very creative day, I toyed with the idea of starting making some swaps for regional training in a couple weeks time, and also making some little thank you cards to give to my lovely customers from my two recent workshops, but on both occasions I decided to wait because I've ordered some goodies and I can't wait to try them out so I'm holding my horses for the moment! I've got a few ideas floating around in my head, now I just have to wait 'till my stuff arrives! I am really excited! 


So for the mean time I am keeping myself busy with getting to know my wheels a bit better (Mainly due to the success of my card I made for Pap using the Watercolor Vine earlier). I've tried the wheels briefly before but never really got on with them particularly well. Perhaps it was because I was using Stampin' Up inks or my technique has changed slightly but I seem to be connecting a lot better with them and really enjoying using them now! I think previously I was maybe pressing too hard which was sending me crooked and also slightly distorting the design! Both of the following cards are very similar, same layout just different wheel cartridge and accessory.


Thanks

Stamp Set: Leaves a la Carte
Ink: Old Olive
Cardstock: Kraft, Rich Razzleberry Textured & Smooth
Accessories: Old Olive Button
Extras: Linen Thread, White Gel Pen, Glue Dot, We R Memory Keepers Corner Chomper


Thanks

Stamp Set: It's Beautiful
Ink: Pumpkin Pie
Cardstock: Kraft, Rich Razzleberry Textured & Smooth, Very Vanilla 
Accessories: Basic Rhinestones
Extras: White Gel Pen, We R Memory Keepers Corner Chomper

As I said they're both very similar. I rolled out the wheel and then adhered a thin strip of Rich Razzleberry textured cardstock. I rounded the top two corners and then the top two corners of a small rectangle of smooth Rich Razzleberry that I adhered to the bottom right hand corner and wrote Thanks on it. To the first i added a button and some linen thread, the second I rolled the wheel out on sone Very Vanilla cardstock and cut out one of the flowers, I finished it off with a rhinestone in the centre for a little sparkle!


Coco

Stamp Set: Every Little Bit
Ink: Basic Black, Real Red, Pumpkin Pie, Old Olive, Marina Mist
Cardstock: Kraft, Pacific Point Textured and DSP
Extras: 1" Circle Punch, Blender Pen, Dimentionals, Scallop Edge Punch

This is just a little card I was working on last week but finished off today. Its a bit messy, but I was just trying to use up little scraps of cardstock and DSP that I had left over! Its similar to the Girls, Girls, Girls and Pie cards I posted last week! 

Please feel free to leave a comment! I love reading them and they really make my day! 


'til next time, 


Amanda  xoxo

its been one of those days...

I have been having one of those days, I have little motivation to be productive and when I tried I struggled! However, life goes on. Its Pap's (my husband's grandfather) birthday, and I needed to make him a card. Now, I have a confession to make, I am REALLY bad at doing man cards! Mostly because I don't really have anything in my stash that is very manly and secondly because I struggle to know what men like on their cards! Anyway, I spend a good 2 hours struggling away and my end result, I have to say I am really pleased with! I think this is going to be a card I am so totally going to make again! Enough babbling, here it is...


HB happy birthday

Stamp Set: Broadsheet Alphabet, Watercolor Vine jumbo wheel (Retired - I would recommend the So Swirly jumbo wheel from the current catalogue instead though if you're interested!)
Ink: Old Olive
Cardstock: Certainly Celery, Early Espresso, Very Vanilla, Old Olive
Accessories: Basic Rhinestones
Extras: Brown Pen (It was almost a perfect match with the Early Espresso which I wanted to use but don't have a marker in that colour yet!), Jumbo Wheel Handle, Stamp-a-ma-jig, Scallop Edge Punch, Dimentionals

I wheeled out the vine in the background and then stamped HB using the Broadsheet Alphabet and wrote happy birthday underneath. Mounted the Very Vanilla on some Old Olive and Early Espresso and finished off  it off by adding some small delicate stitching lines using a brown pen. I punched out the scallop border and adhered that above the vine border. I popped the HB topper on dimentionals and finally finished it off by adding a couple rhinestones to just add a hint of sparkle! Overall a very simple but I think effective card! Definitely going to be making this one again! 

Well, I think that's about all I have to offer right now although I'm thinking I might battle on and make a few more cards! 

Oh and one last thing, don't forget there's only a few hours left to get your free Sale A Bration set when you spend £45. They're really nice sets so don't miss your opportunity! To see what you can get for free, check this link out! http://www2.stampinup.com/gb/eng/7118.asp If you want one though you only have another 6 hours to put in your order!

Love, 

Amanda xoxo

Sunday 27 February 2011

a few photos from the weekend!

All these images are courtesy of Honor Rankin. She came to stay with my friend Laura for the weekend and therefore came to the workshop I held on Friday evening! First off a few of the workshop, creativity and end results of the make and takes! 

Laura with her I{Heart} Hearts creation!

Honor with her I {Heart} Hearts creation!

Me showing Kate how to decorate a candle!

Creativeness in action!

On Saturday afternoon we had some people over for an afternoon of fun and games, it was great fun! My brother-in-law, Richard, and cousin-in-law, Andrew, complete with fancy dress costumes. (They only stayed for a short while as they were off to do games for my second-cousin-in-law, Harry's fifth birthday party! The guys' costumes were amazing!!

Richard riding a bucking bull (left) and Andrew riding a raring horse (right)

I hope you enjoyed this brief snapshot into my weekend, I had so much fun, it was a really great weekend. 
Seeing the boys in those costumes = priceless

xoxo

Saturday 26 February 2011

march workshop dates.

So far I have 2 workshops planned for March at my house. The first is on Friday 11th at 7:30pm and the second is on Friday 25th at 7:30pm. I will be showing off some lovely products and you will also get to have a go at making something to take home with you! There might even be the odd surprise for people that attend! Both workshops will be showcasing the same lovely demonstrations and products, the 2 dates is to simply give you an option as to which date is more suitable for you! I hope many of you will be able to make it! If you would love to come but neither of these dates are suitable, let me know and I will do my best to arrange another workshop to suit you! Alternatively, host a workshop, have a bunch of your friends over for a fun evening and get a load of freebies (just for hosting - its totally worth it!). 


I am really excited to be a demonstrator now, the nerves of speaking in front of a group of people is starting to decrease slightly and without trying to sound full of myself I am becoming more aware of my ability to do such a job! I just can't wait to share my love of paper crafting and stamping with even more people! It is such a joy to be able to share it with you all both here on my blog from day to day and also at the workshops. Its also fantastic to see others enjoying it too! The positivity so far has been unreal! Thank you to all who have given me support over the past few weeks and especially this past week in my new venture...I hope for even bigger and better things in the future! 


Amanda xoxo

i am excited!

Last night was my second workshop, and I think it went well! I think I was actually a little more nervous about this one as it was my friends and peers, some of whom I studied art with at university so I had big expectations to live up to! They all seemed to have fun though and I was extremely impressed by their lateral interpretation of the make and take! It was so fun to see what they had created using the basic idea from the card I demonstrated using I {Heart} Hearts. I also got a further booking, its not 'till August but that just means I have more time to get excited about it and think of lots of exciting things to show! 

Secondly, on waking this morning and wandering downstairs, there was some post waiting on the mat for me...excitement in itself as I am a HUGE fan of getting post! It was the new mini catalogue from Stampin' Up! WOW!! there are so many cool things in there and I cannot wait until August 1st when I can share it with you all! There is some uber cool things in there and I think I am going to have to get saving now!!! Also VERY excited for regional training to meet other demonstrators and learn more about the products in the mini catalogue! That's all I can say for now, but until the big release on April 1st, watch this space for more creations using items in the main catalogue. 

Hope you're all having a great and fun filled weekend! 

Love, 

Amanda x

Thursday 24 February 2011

first wedding card of the year!

Last year was wedding crazy, and this year is almost as busy! I love weddings! I'm really excited to be going to the States to see my cousin Rachel get married to her beloved Edwin in June! Before that, my friend and bridesmaid Kathryn is marrying Rob in May. In August my cousin-in-law Naomi is marrying Phil, and then at the end of the month my cousin Ben is marrying Hannah! Busy times! But really happy and fun too! Looking forward to them all! This Friday a guy from a church we have a connection to in Northampton is getting married up in Newcastle. We aren't going to the wedding but thought I'd get into the wedding spirit, use some of my new stash and try something different and make Stuart and Sarah a wedding card! I hope their day is as special to them as ours is to my Stuart and I. I also wish them all the best for their future lives together, as they start out up in Newcastle!


Wedding Birdies - Stuart & Sarah's Wedding

Stamp Set: Hero Arts Best Wishes (I really wanted some little birds but these were the only suitable ones I owned, if I had the time to get a SU set I would've loved to use the little birds from Love You Much. MR. and MRS. stamp was from the same set, I would suggest using MR & MRS stamp from Basic Phrases set instead!)
Ink: Basic Black, Marina Mist, Real Red, Pumpkin Pie, Versacolor Amythest (I don't yet have my Rich Razzleberry ink pad which would have been perfect!) 
Cardstock: Kraft, Very Vanilla, Pascific Point DSP, Rich Razzleberry DSP
Accessories: Basic Rhinestones
Extras: White Gel Pen, Glue gun, Scallop Edge Punch, 1 3/8" Circle Punch, Blender Pen, We R Memory Keepers Corner Chomper

I've seen these paper rosettes on lots of blogs and videos and have been dying to make one, I thought this card would be a suitable time to try making one! I cut the Rich Razzleberry DSP 12" x 1.5", punched with the scallop edge punch then scored at each scallop dip and folded it concertina style. I glued it together with glue gun and then stuck the stamped, coloured in and punched birds. I adhered strips of the Rich Razzleberry and Pacific Point DSP to the bottom around the Mr and Mrs sentiment and finished it off by rounding the top two corners doing some white stitching. I'm really please how it turned out and I am totally going to make more rosettes now!

Have a fantastic day! 

Amanda xx

Wednesday 23 February 2011

my first workshop = a success!

This afternoon I had my first workshop, hosted by my wonderful Mom! She had 7 guests and they all seemed to thoroughly enjoy themselves! It was a really fun mixture, a lady from my Mom's work who is into papercrafting, but hasn't tried stamping so much and her Mom, a friend that has dabbled in papercrafting (mainly doing her wedding stationary) and then some people from Mom's church who havent really every done much before! So it was really fun being able to introduce them all to the wonderful world of Stampin' Up! 


They especially loved the candle (see a few posts below) I also added tiny little rhinestones to the centres of the pumpkin pie flowers just to jazz it up a little and give a little sparkle! The So Many Thanks demo was also really successful! I was very impressed at how well I did. I went for a run through with Stuart late last night and my mind just kept going blank and I could not explain myself or what I was trying to do at all! I was SO nervous!!! 


The make and takes proved a hit too, I think they really enjoyed getting stuck in and trying out the stamps and inks for themselves! My Mom's colleague brought her daughter, nephew and niece along too. They just played Nintendo DS most of the time but after a bit of persuasion, the little niece got stuck into the make and take. She was so sweet and really enjoyed making her card, it turned out absolutely beautiful!! She is a very talented little girl! 


Mom made some really yummy date and orange cake and some apple sauce muffins, a really nice treat for everyone while they browsed the catalogue, and completed their orders! 


I know a lot of people kept telling me before today, you'll be fine, you can do it, and I knew I believed it but I still was really nervous and slightly uncertain of my ability to pull it off. Having now done it, I feel my confidence has grown hugely and I am so excited to have more workshops now. Next one is on Friday night at mine. I also managed to book one with my friend who was there today and Mom's work colleague! I am SO excited!! 


I fully intended to take a few photos to document my first workshop, mainly for sentiment sake, unfortunately I forgot. To be honest, I was bound to forget something and I think of all the things to forget, that was not a major thing to slip my mind! Perhaps I will take a few on Friday! 


I just want to say a huge thank you once again to Rhoda, my upline, for all the help she has been. (Rhoda - they loved looking at the patterned paper swatch cards you made for me - Thank you!!!)


Now, I didn't get to bed til way gone 2am and woke at 8 something this morning. I am off for a well deserved sleep! 


Thanks for taking an interest, reading, and please do leave a comment! I love reading them all and hearing your thoughts about things I do and create! 


Love to you all, 


Amanda xx

Monday 21 February 2011

virus free and back in business

I am officially virus free...thanks to my fab husband! I'm so glad that is all over! It was so horrible having a virus and having no clue what to do and there's that really real fear that you could loose everything. As a result, I am now protected...again!


Now, on to more exciting pretty things, I have a few more cards to share with you. First is my mother-in-law's birthday card, it was her birthday on Friday. So here we go...


Heather's Birthday Card

Stamp Set: Stipple Butterfly (Retired)
Ink: Basic Black, Old Olive, Real Red, Pumpkin Pie
Cardstock: Very Vanilla, Old Olive, Kraft
Accessories: Very Vanilla Satin Ribbon
Extras: White Gel Pen, Glue Dots, Dimentionals, Blender Pen

Ok, so, I know this stamp is retired but I thought it would be just perfect for Mum's card, and it turned out so well I just HAD to share it! I used the blender pen to colour in two butterflies, then cut one out to layer over to add another dimension, folding the wings up and adhering it with a glue dot. I used a scrap of Kraft to make my card, a different style card for me than my usual rectangular/square cards! I think the white stitching and ribbon just really finishes it off! The sentiment was written in my own handwriting, to add a personal touch! 


Thanks...I Needed That

Stamp Set: Every Little Bit, Fun and Fast Notes
Ink: Pumpkin Pie, Old Olive, Basic Black, Real Red
Cardstock: Very Vanilla, Pumpkin Pie, Old Olive
Extras: Dimentionals

Just a really quick little card I made to use up some little scraps I had lying around (as you might be able to tell, I am attempting to be better at using up my scraps before starting a fresh sheet). I coloured in the pies with the blender pen, cut them out and mounted them on pumpkin pie and old olive cardstock, but  as I was laying out the card I came to the conclusion it was looking a little bare, after a little thinking, I decided to use the pie stamp and old olive ink (stamped off once for a paler shade) to make my own patterned paper and a little to my surprise it actually worked really well! It not only filled in the empty space but pulled everything together sweetly! Finished off the card with a torn strip of pumpkin pie and the "thanks...i needed that" saying from the fun and fast notes set. 


Birdie

Stamp Set: Fun and Fast Notes, Fast Flowers Wheel
Ink: Versamark, Basic Black, Real Red, Pumpkin Pie, Old Olive, Marina Mist, Daffodil Delight
Cardstock: Whisper White, Marina Mist, Pacific Point (Textured)
Accessories: Linen Thread
Extras: Spiral Border Punch, Stampin' Around Handle, Blender Pen

I used versa mark to stamp the fast flowers background. punched the spiral border punch on the whisper white and then stamped and coloured in the birdie on the cardstock. I ripped and distressed the pacific point cardstock, brushing the versamark pad over the cardstock to emphasise the texture. It was finished off by wrapping the linen thread around several times and then tying into a bow. 

I hope you liked what I had to share today! 

Until next time, 
Amanda x

frustration and relaxation....what a combination!

Frustration: What started off such a great week, took a turn for the worse last Thursday. I got a trojan computer virus, thankfully I have a geeky tech husband so together (when I say together, what I really mean, is he, with me in the background saying "I don't understand", "what do we do next", nagging and being an annoyance I'm sure!) we've been trying to solve the problem. Unfortunately its still not fixed. Sad times!

Relaxation: On the plus side, we went away to Sheringham, Norfolk for the weekend with some young people from church for a weekend away. We had great Bible teaching and discussions, and it was really lovely to see the sea again, even if it was a little bit bleak, windy, cold and wet, we got to hang out with our friends, some of which I haven't seen in quite a while!

I have a few more projects I've been working on to share when I have my computer back up and running and can upload images (I'm using Stuart's laptop at the moment but can't upload files on here).

I hope you all had a lovely weekend, and are having a pleasant Monday! Don't forget, if you're in the Northampton area, my workshop is this Friday evening so please come along for some fun and craftiness!

Love,

Amanda xx

Wednesday 16 February 2011

birthday card

Its been a busy day, printing off things I need to make myself totally prepared for workshops next week, designing business cards to hand out too, then off  to work at Aunt Lil's (my husband's great aunt) getting her dinner and cleaning over lunch period, going to Bible study at my mother-in-laws this afternoon and then went back to my friend Donna's for a bit of a impromptu chat..It was also one of my best friend's (she was actually one of my bridesmaids at my wedding last July) birthday today, we were going to a party at her this evening and I wanted to make her a special card from my stash of stuff, and despite not much time, here is what I finally came up with.


Kathryn's Birthday Card

Stamp Set: I {Heart} Hearts
Ink: Old Olive
Cardstock: Whisper White, Old Olive, Kraft
Accessories: Pumpkin Pie Button, Linen Thread
Extras: Glue Dots

I know this card was quite similar to a card that I made yesterday, but I just felt it was really something I wanted to work with a bit more. I used a different stamp from the set for the background, but still stamped off to give a bit more of a subtle look. I wrapped the thread around several times and added a button, this time pumpkin pie to give a tiny pop of colour! I actually originally made the card the same size as the card yesterday, but it just was not working. I really didnt know what to do, the strip of kraft cardstock was just too wide in relation to everything else on the card, so I carefully peeled it off (a bit of a tricky task as Stampin' Up's snail adhesive is really good and strong) and then I chopped off a chunk of the bottom of the card to just make it a lot narrower, and suddenly it just worked so much better! I was happy. I hope Kat liked it! 

I had a really nice evening at Kat and Rob's tonight. It was nice to see their new place, and meet their new babies...guinea-pigs! Gizmo and Dill are absolutely gorgeous! they have really .long quirky white and ginger furr...its so funny and cute looking. I had such a long cuddle with Dill, he just sat so still and snuggled! I totally fell in love, now just to persuade my husband to let me have some! I think that might take a while, but a girl can try, cant she?! 

I'm off to work on my business cards some more. I hope you all have a lovely evening, until next time! 

Amanda xxx

Tuesday 15 February 2011

my week just keeps getting better!

Wow, overslept this morning and I must've been shattered as I didn't hear the door bell. When I came down I had a slip of paper saying that I wasn't in and they had delivered the package to my neighbour. Naturally my neighbour was out...grr! I had absolutely no idea what it could possibly be, and its been driving me totally nuts all day! I hadn't ordered anything else and really wasn't expecting anything to come. Finally he came home and I was able to collect my mystery package! It was from Stampin' Up! Even more confused now, but still I opened it and it contained some really wonderful goodies! Some beautiful buttons, linen thread and sparkly rhinestones (the magpie in me has totally come out and I really can't wait to use them, they are just stunning!) So, I still don't really understand, but I am so very grateful to whoever it was! It was a most wonderful surprise! :D


I've spent today cutting out all the pieces I need for my demos and make and takes for the workshops next week. feeling a bit more organised and relaxed about the whole thing now. I'm sure the nerves will pick up again next week but being prepared definitely helps!


I've made a few more cards, but I think I'm going to have to make a couple more now with my new goodies. Exciting!


Girls, Girls, Girls
Stamp Set: Every Little Bit
Ink: Basic Black, Pumpkin Pie, Old Olive, Real Red, Marina Mist, Daffodil Delight
Cardstock: Kraft, Whisper White
Accessories: Whisper White Satin Ribbon
Extras: White Gel Pen, Dimentionals, Fiskars Paper Crimper, 1" Circle Punch, We R Memory Keepers Corner Chomper, Blender Pen

Last night I couldn't sleep, and while I was flicking through the catalogue, in a vain attempt to sleep, I saw the paper crimper, something that my mom and I bought when we first got into Stampin' Up ten years ago. I used to use it on lots of my projects to finish them off, but I haven't used it for the last few years, the white gel pen sort of took over! I kind of miss using it so thought I'd give it a go, trying to make a card using it. I thought I'd use a couple stamps from Every Little Bit and use repetition to make them work for a card. I cut the ribbon into a "V" cut, just to try something else a little different. Its nice to push myself to try different things. I enjoy the challenge! 


Friend

Stamp Set: I {Heart} Hearts
Ink: Old Olive
Cardstock: Whisper White, Kraft, Old Olive
Accessories: Old Olive Button, Linen Thread
 Extras: Dimentionals, Glue Dot, We R Memory Keepers Corner Chomper

I really loved the stamped off heart pattern as a background, this piece of whisper white was a bit I had when done when I was playing around with ideas for Stuart's valentine's card. I figured it was a shame to just let it go to waste so I tore off the remaining paper. Tore some strips of old olive cardstock to enhance the ripped edge (tearing isn't really something I have done much of before so it was nice to have a go and experimenting with it). I decided to ink the edges to give a bit more definition to the layers of cardstock. The buttons and thread came just as I was trying to finish off this card, it was just the perfect finishing touch! I think I will give this card to my mom next week at her workshop to say thank you for hosting a workshop!

I hope you are all having a most pleasant day! 

Amanda xoxo


Monday 14 February 2011

just a bit of play

I have spent the entire afternoon playing and being creative with all my new goodies...it felt so good! I am just loving all my new stuff and the quality of the materials is outstanding...its so nice to work with materials that don't let you down. On a more serious note, I was also working on demos and make and take stuff for my workshops I have coming up next week. My mom is hosting one on Weds 23rd in the afternoon, and mine is on Fri 25th in the evening, if youre interested and in the area youre very welcome to come along! Anyway, as promised, here are the outcomes of my day of play! (sorry the the low image quality, by the time I had finished playing and cooked dinner and was ready to photograph and blog, there was no natural light left and you know how rubbish indoor lights can be for taking photos, but still, here they are)


Candles 
Stamp Set: Greenhouse Garden
Ink: Pumpkin Pie, Real Red, Old Olive
Extras: Candle, Heat gun, Greaseproof paper
For more information on how I decorated these gorgeous candles come to one of my February workshops. 
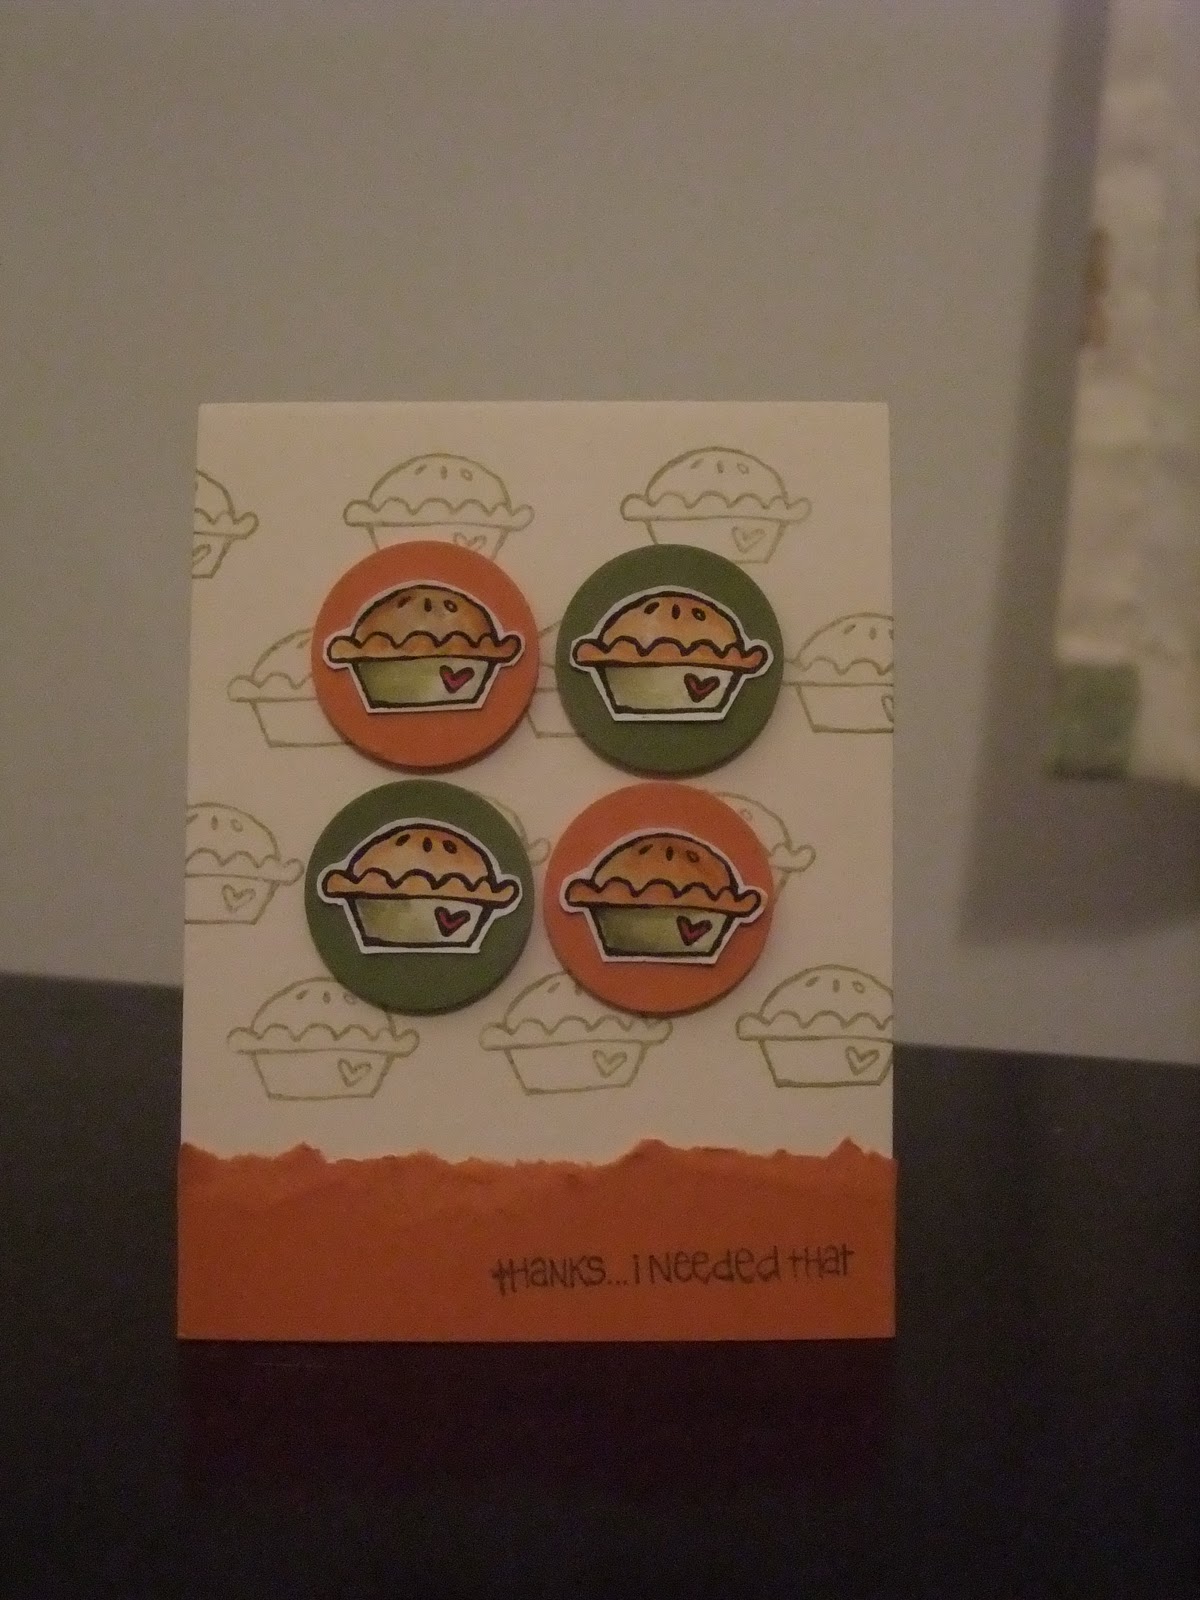


So Many Thanks
Stamp Sets: So Many Thanks, Every Little Bit
Ink: Old Olive Classic Ink Pad, Marina Mist & Daffodil Delight Stampin' Write Markers
Cardstock: Whisper White, Kraft & Brights Patterned Paper (Daffodil Delight Polka Dot, Old Olive Flourish, Pacific Point Flourish)
Extras: Dinentionals
The second of my demos for the February workshops. 


Friend Love
Stamp Set: I {heart} Hearts, Fun & Fast Notes
Ink: Real Red, Pumpkin Pie, Old Olive
Cardstock: Whisper White, Pumpkin Pie
Accessories: Whisper White Satin Ribbon
Extras: Dimensionals
My make & take for my February workshops, if you would like to make this card, come along. CASEd from a card made by my upline, cousin-in-law, Rhoda. She has been really helpful and supportive, helping me to get thing and projects organised for my workshops. Its been fab, especially as she lives up in Shetland! 


Thanks For Sharing You With Me
Stamp Set: Fun and Fast Notes, Fast Flowers Wheel
Ink: Basic Black, Versamark, Real Red
Cardstock: Kraft, Pumpkin Pie, Real Red
Extras: Clear Embossing Powder, Blender Pen, Dimentionals 
A sample card to showcase other techniques for my guests to see at my workshops next week. this one is highlighting the use of versmark inkpad for creating a tone on tone background and then I added clear embossing powder to the versamarked hedgehog which I popped up in front with a dimensional! 


Happy Birthday Wishes
Stamp Set: Fun and Fast Notes
Ink: Basic Black, Pumpkin Pie, Marina Mist, Daffodil Delight
Cardstock: Kraft, Whisper White, Brights Patterned Paper (Pumpkin Pie Polka Dot)
Extras: Blender Pen
Just a really simple little card highlighting the blender pen with ink pads and ink refills. 


Clover
Stamp Set: Every Little Bit
Ink: Basic Black, Versamark
Cardstock: Kraft, Whisper White
Extras, Blender Pen, Stampin' Pastels (Garden Green-retired), cotton ball
Again, a really simple card just showing another way to use the blender pen, this time to fill the image with stampin pastels (I had to use a retired colour as the set I have is one I bought in 2002, when I first got into Stampin' Up in the States). the background was stamped in versamark and then the pastel was applied to the inked area with a cotton ball, just to highlight another use of the pastels. 

And finally, I have one last card to share with you all, seeing as its Valentine's Day, I figured I should make my wonderful husband a sweet valentines card. So here it is...


I LOVE U
Stamp Set: I {heart} Hearts
Ink: Old Olive, Real Red
Cardstock: Kraft, Real Red
Accessories: Whisper White Satin Ribbon
Extras: White Gel Pen, Dimentionals, We R Memory Keepers Corner Chomper (I know its not stampin' up but I really felt that the corners could be rounded to improve the card)
To get a more subtle background effect with the heart stamps I used the stamping off technique, stamping each one off once on a piece of scratch paper before stamping onto the Kraft cardstock. I'm really pleased how it turned out, it really makes the white and the red in the foreground stand out! I think that by rounding the corners it really enhances the curves of the hearts. 


And just the finish off this mamoth blog entry, geesh I didn't realise how long it was or how long I've been sitting at this computer screen, I thought I'd just fill you in on a couple other lovely suprises I had today. 


First, was from the lovely Rhoda, my upline, she so sweetly sent me some swatches she made for the designer patterened paper available from the catalogue so I can show it off to all of my lovely guests. The paper is gorgeous and yet another reason why you should totally come to/host a workshop so I can show it all off to you! She also sent me some lovely cards she made with the current sale-a-bration sets that are on offer for free when you spend £45 until the end of February. And some really cute little swaps she got when she went to convention last November. It really was so kind of her, and I am very grateful for all of her wonderful ideas she has given me! 


Second was from my darling husband. He came home from work today with some really gorgeous white daisies and a heart-shaped balloon for me. I LOVE the flowers! I thought the balloon seemed a little out of character and until he told me the florist just gave it to him for free...yay for free stuff! 


I hope you have all enjoyed seeing a little of what I have done and seen a bit of what I'll be showing at my workshops. Comments are always a pleasure to read and make my day! 


Have an awesome rest of your evening,


Amanda xx

Starter Kit Arrived!

Ok, so I am a tad excited...to put it mildly! My starter kit came on Friday night, unfortunately I've had a busy weekend with meetings, organising youth group stuff at the church, tidying the house and putting what felt like a gazillion boxes up in the attic (its only been waiting to be done for about the last 6 months!) and having the parents and brother over for a very yummy Sunday lunch. So despite my excitement I haven't had the chance to play yet :( But now its Monday, and I can play and create! Yay! So stay posted for some pics later today.

Have a good day...I'm off to play!

Amanda xx

Friday 4 February 2011

everyone has to begin somewhere...mine is here!

So, here we go, I have just become a Stampin' Up! demonstrator, which I am totally excited about! Its such a fabulous opportunity to meet new people, especially people who are into paper crafting and also share my love of paper crafting with others! If you would like to host a workshop in your home and learn more about the wonderful Stampin' Up! family and all the awesome products they sell, please get in touch! Also, for hosting a workshop you get lots a cool free stuff so its totally worth it, and all you have to do is invite your friends over for an evening and maybe provide a cuppa! what could be simpler!? So not only do you get a fun evening with your friends, you can learn how easy and simple it is to be creative! It really is so easy, anyone can do it! 


So far I'm having one workshop this month at my place to get me going, so if you're free and in Northampton on Friday 25th February at 7:30pm, come along and check it out. I promise it will be fun! 


As for this blog, I hope to post news of any exciting offers Stampin Up! has going and also share a few cards and projects I make. You might just see something here that you're dying to know how to make, if that's the case, drop me a line and we'll organise a party! 


It really is such a joy to be able to share what I love with others and even get a little bit of money for doing it! If you think becoming a demonstrator is something you would like to do, please don't hesitate to get in touch and ask me how easy it really is! (you get discount too!)